How to Print Directly on your Classic Happy Planner Inserts

Hello Friends
Hope everyone is well out there.
Today I wanted to share how to print on your HP inserts. I have been printing on full-sized paper and just cutting for the last, I dunno 5 years or so and it never crossed my mind to try this. SO I HAD TO SCREAM it from the rooftops once I did it and it was so easy. Please do this if you do your own inserts, no matter the size or planner. It was so easy to setup and once I did it, that was it, it’s done forever at this size.
I felt like an idiot, so yeah I have to share this. If subscribe you are getting this in a newsletter too.
So to Print Directly on your Classic Happy Planner Inserts
You need to go into your printer settings and set up a custom page size. For me, I currently have an HP Printer – and while I love it and it’s ink service, I really want a backloading one eventually (for more thick and larger prints). Anyway, here is the HP Windows Settings, I imagine MOST printers will be similar. For Mac you might have to google around, the site I linked does have Mac instructions.
Essentially, the steps are as follows:
Open Control Panel
Go to Devices and Printers:
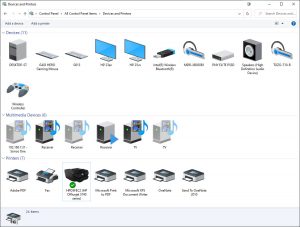
Click your printer – don’t double click!
At the top, a menu will pop up and you select “Printer Server Properties.”
Check the box – “Create a New Form” and make a title
In the new available bottom menu, set your size. For HP it is 7 width and 9.25 for height.
Leave margins alone.
Save Form.

DONE
Now when you open any PDF insert you will have this paper option.
How to print it in Adobe PDF
Now I have not tested this in the windows JPG printer, I print in Adobe as it gives a better margin.
In Adobe, you open your insert and go to print.
At the bottom, hit “Page Setup…”
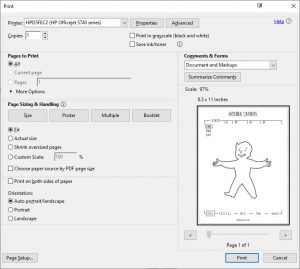
In this new menu, under SIZE, find the new size you just created.
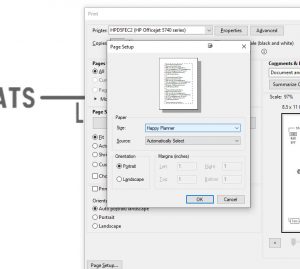
Hit OK.
The menu won’t look too different, but it will save the size of the paper above it.
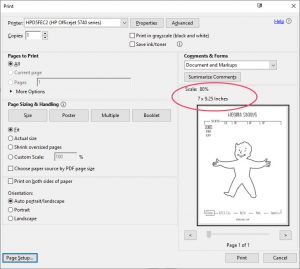
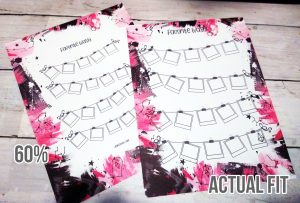
Now, depending on the paper you are printing on, you can further change the size with the Custom Scale Tool.
When would this be handy? Say like me you, you made an insert with WAY to big side decor.
Opps.
Hit print when you are happy with it.
YES, it was that easy. Yes, I nearly died when I realized it. You can even run blank inserts you buy through it, though I suggest doing one at a time (I think the holes trip it up, and my printer pulled extra thru the first time messing up the print). It can even be done front to back. Seriously.
I am so glad I did this and I just had to share. I am so excited about this. I am going to try to do printed decor on the pages too – I mean it should just be sizing right?
I think the fact you can print directly on their already punched inserts just elevated my life.
I hope you enjoyed this quick little tutorial.
have a great week!
