Digital Bullet Journal – Daily pages in Slides (in Google Drive)

Hello Friends~
Continuing this series, I want to touch on Slides today. I think Slides is the best option for a digital journal because you can do a whole week, and scroll very easily into the whole month – just like flipping pages. Unlike Sheets which has to have a new sheet for each week/day – or Docs which needs an outline, you can keep creating a page and navigate it pretty easily.
First out, here is my sample I am working on
The format is also a drag n drop type editor, so it makes adding images and details very easy for beginners. No having to line anything up or guess the size here.
You could also technically journal in the notes section, which would be handy for keeping track of that.
So to get started, create a blank slide and delete the items on it. It usually auto populates with some text boxes, you can just delete those.
To Create a Table
Again, go to INSERT -> Table and select Size.
This time I am going to use 7 Wide 4 Tall. Since I can arrange it where I want, I can put notes in it’s own section or whatever here. I still do four as I want to put the dates on top. To edit your table there is no ‘table properties’ like in docs. It is simple drag select where you want it, move the lines as needed. Then, to change the colors, highlight and fill. You can change the line color, type and text color as well.
Either highlight small sections to edit those, or click the edge of the table to edit the WHOLE table. I love slides for making it so easy to add elements and edit them.
You can toss a background in the back of the ‘slide’ for a cool effect too. To do that, simply go to SLIDE -> Background. It does not allow tiled backgrounds, just full page (something to keep in mind) You can also edit the background by right clicking on the actual slide.
Also if you add a background, I suggest making your table have a white background for the text areas. Just to ease your sight.
Just for Fun
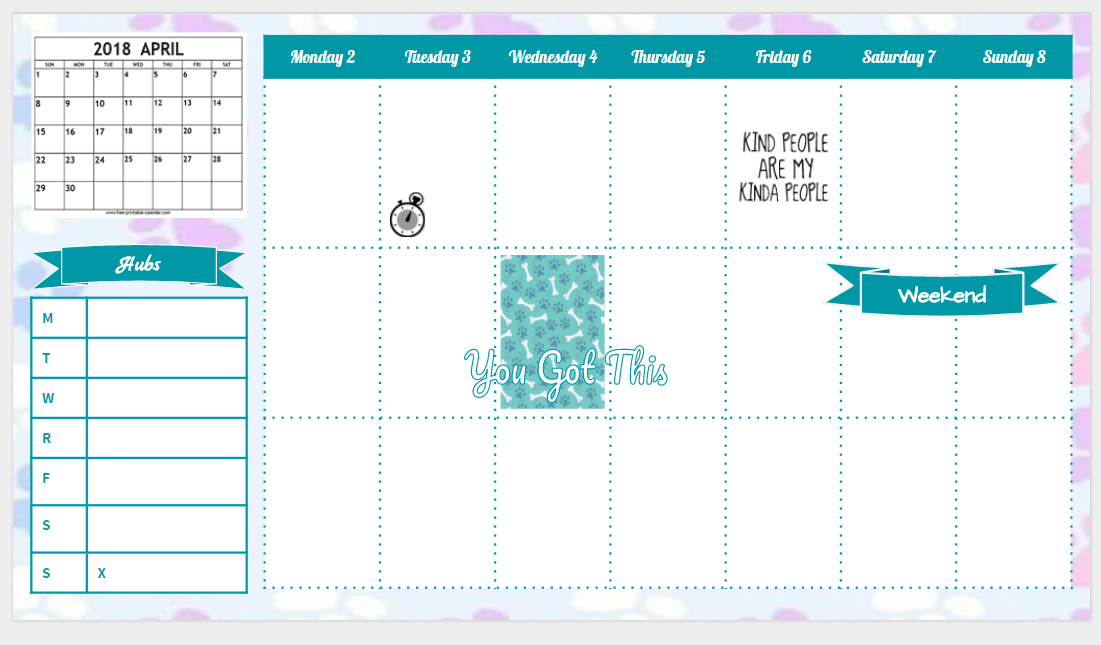
Now for some fun things, I immediately went and snatched a monthly calendar. Copy and past, then put it where you want. (I just google searched for “April 2018 Calendar”) I then just picked one I could see at that size and pasted it in the corner.
SEE how easy it is to add clipart?
I also added a schedule in the form of another table on the ‘notes side’. I keep my SO’s work schedule so this is a must for me. It’s very handy if you do shift work.
This system will also give you some guidelines when resizing items so you can line them up perfectly. It also has some built in shapes, so does Docs but I didn’t really use them before as they are harder to line up. They have some fun banners you can use anywhere.
Get to them by going to INSERT -> SHAPES -> Call Outs
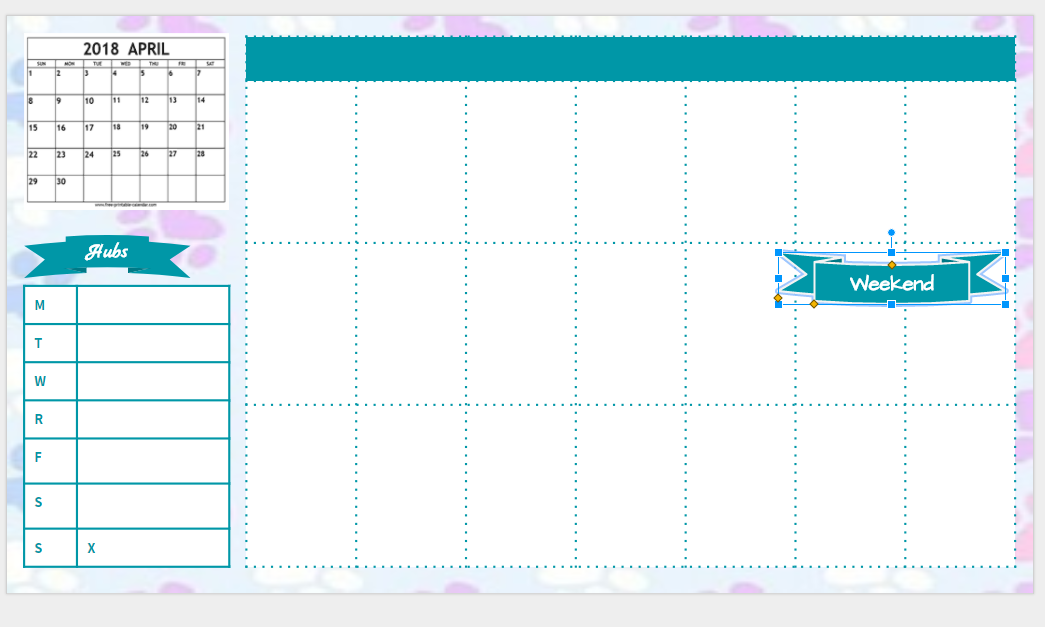
Then you can adjust colors and make your own banners very easily right in this program. The yellow dots length the actual ‘middle’ section, so you can make it longer with less ‘ribbon’ on the sides. Then they are colored the same way you did the table, lines, fill and text edits.
They have a lot of shapes you can use without even getting sticker fancy.
Remember with digital you can use all the fonts you DESIRE. That is probably my favorite part. I feel like I am terrible with my handwriting so I very much enjoy writing digitally as a result.
To add stickers & Clipart
Simply find what you want, such as a clock icon, then copy and paste it in. It uses a simple drag n drop format so you will need to manually line it up. It does however mean you can ADD ANYTHING. This also means it will cover your text if you are not careful.
Backgrounds for the cells, easy. Find what you want, and paste it in. Then just crop it to size. Same with quotes, super easy to copy and paste in, then crop how you want them.
Now, if you want to put text over an image, I would do a text box. It just makes it easier. Really anything you can do in PowerPoint you can kinda do here. So if you want word art over that washi, then by all means.
Man that was fun. I really like this method, it works really well. It’s very mobile friendly too, you can view it and zoom in on the phone. So you can plan your week, view it on your phone, make changes if needed, and journal in the bottom. It works really well for what it is.
Now, for navigation. I would personally do my latest week at the top and divide with a big ol’ monthly calendar that could be easily visible from the navigation panel. This would put the latest month and week on top of the old.
This is also a pretty cool way to print them if you wanted to.
Adding an Animated Gif
I wanted to try this. Just to see if you could.
And yes, you can.
To add an animated GIF or sticker, you have to have it saved on your computer, then add it via Image Upload
INSERT -> Image -> from Computer
But it works. You can see Aqua-sama crying in mine. My spirit animal. This adds a ton of new options for your stickers. Animate emotes for your days, moving clocks, etc
So, hope this worked for you as easily as possible. I had a lot of fun playing in this program. If I were to go all digital, this would be it. For me though, there is something satisfying when holding a planner in hands. At least for memories.
Thank you for reading!