Notion Databases Basics – how to setup a goal board
Build a Notion database board that actually inspires you. In this walk through, I share how I set up my own Notion dashboard for success.
Howdy Friends;
I recently redid my goal dashboard and I was decided t do a walk through of what that was and how it looks.
Now I am not using a board, at the moment, as I have them sorted by categories – level 10 style – but you can easily use this method to create a Kanban board method. It works great as you can easily update the status, keep notes in the pages, and use icons and displays to make it visual.
Now to start, I am going to create a new database – inline your page.
Name your database, if it doesn’t have any pages (tasks) make a page and name it example so you can use it for properties in a few. It’s much easier to add properties in a page IMO.
In the page view, click add properties this where we will start adding what we need.
Add Status and whatever you might want.
I suggest creating a SELECT property and naming it ‘categories’ or something similar.
If you work with other people in a team setting, ‘last edited by’ is a handy field along with date and time stamps, and creating a ‘owner’ property. I sometimes add a checkbox, to mark as complete, and a completed by or ‘due date’.
If it’s a blog post for example, you might add a ‘posted on’ date. I have. You can customize the view and hide properties all over, so don’t worry if it doesn’t currently apply to all your goals uniformly. You can add as you go as well.
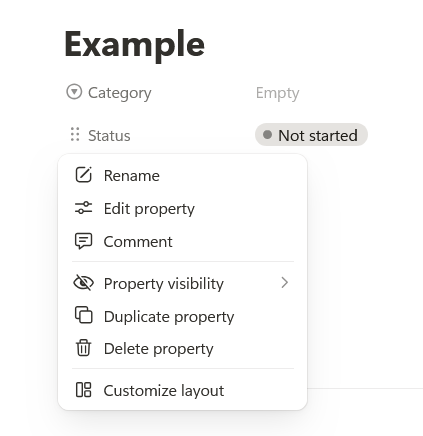
Once you have the properties created time to customize them. For example, with STATUS I recommend adding a ‘hold or paused’ status or a ‘on-going’ one for year long projects.
You can do this by going to the property, clicking it and hitting EDIT. From here, you can edit and change colors.
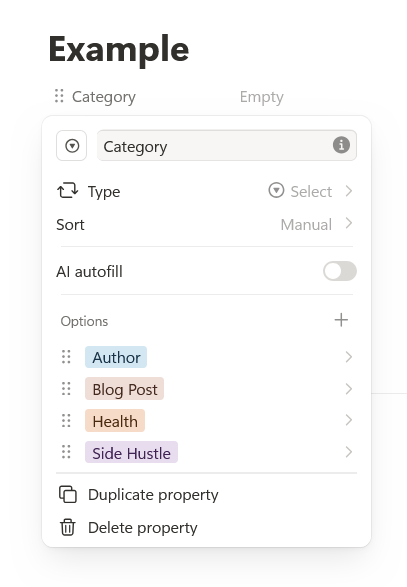
Do the same with categories, for example use Level 10 names if you do those as well. I recommend breaking them up by categories so you can easily sort them later. Feel free to make these up or outright just add to Level 10 if you need more:
Examples would be ‘side hustle’ ‘health’ – ‘blog post’ – ‘art commissions’; whatever you need here. I use Level 10 and then added in ‘blog post’, ‘side hustle’ and ‘author’. You can change the colors to whatever too, if you want to color code.
Okay now close the example page and let’s organize how we see this stuff, this is the real value. You can use this method for your reading trackers, etc – you just change the view for your goals.
So first is a default view which is a table. Let’s change that to Kanban Board first, since you may like that. I don’t like the boards, as they just take up so much space on the page but this is the most common use of a tasks list because you can just drag stuff around – done, in progress, etc.
Yes you can break these up by categories still too.
Let’s get started. In the view head over the main menu – the three dots in the right far corner.
This menu has some fun options when you come back in board, for example you can color code the sections here (once it’s switched to board) – so come back here to pay with your settings.
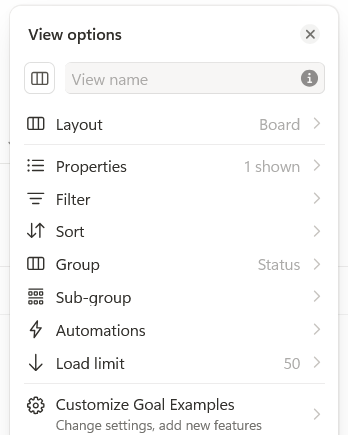
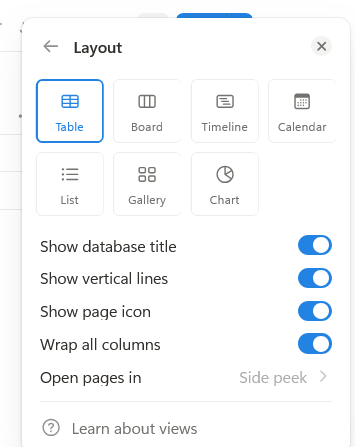
Lots of options, let’s hit board and organize this. By default it sorts by status first. Back to the three dots for some customization. I am just going to breakdown the menu real quick:
- Layout → go back here to custom the board view, add icons, change the sizes of things and color code as I said.
- Properties → edit properties quickly in here; You can show or hide them, etc
- Filter → we will get to last, but edit what you see essential (i.e. just paused items)
- Sort → you can change how items are sorted in each section (alphabetically)
- Group → this is where you can change the first grouping, which is currently status. I recommend leaving it status for the board. You can drag your boxes to complete or paused, etc for quick updates.
- Sub-group → here, go in here to add our category sort. You may have to go in and manually VIEW items if they are empty to start with. Board is kinda hard to add tasks to IMO but I have a tip for that below.
If you turn that on, you should now see first sort is by STATUS – completed or not. Then there will be little sections of each category. You can hide any of the categories or statuses to create filtered views – for example you create an author only tab.

This is the power of notion. More status = just more ways to sort and view your items. So now lets add some fake items. You can also arrange these properties in anyway, for example if you want completed first, you can go into the grouping section and MANUALLY move that to the front.

You just drag the move icon, the 6 dots, up to where you want.
Tip #1 Adding tasks
Tip number one is to create your list at the bottom of the page, or somewhere else, just type it out normally.
Author task 1
Author task 2
Blog post 1
Random goal 1
Then DRAG that into your data base by just dragging it into any section in your data base. No need to create individual pages, or use a table view, drag this text into your data base and it will convert to pages and you can drag and sort from there with the properties.
I often make tasks dump list and just move them to the goal page and dump them in the right categories.
Tip #2 Status Editing
Tip number two is one I did not know for a long time, you can select multiple pages or items in a database, and edit their properties all at once. VERY handing for this bulk adding. Say you want to set all their owners to you, highlight them all, right click on them and in the menu you will see an ‘edit properties’ option. You can edit it all at once.
From here you can play with your design of the board. If you add a cover, that will be a board cover for your block, example how I use manga covers for my reading stuff:
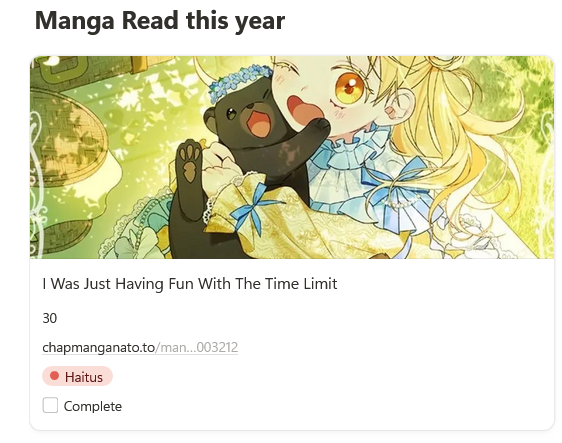
SO CUTE and easy. Upload or copy a link and adjust as needed, You can make it smaller as well (and fit a book cover better if you want). You can fiddle with cover and icons under the type of sort (3 dots -> board -> edit in here).
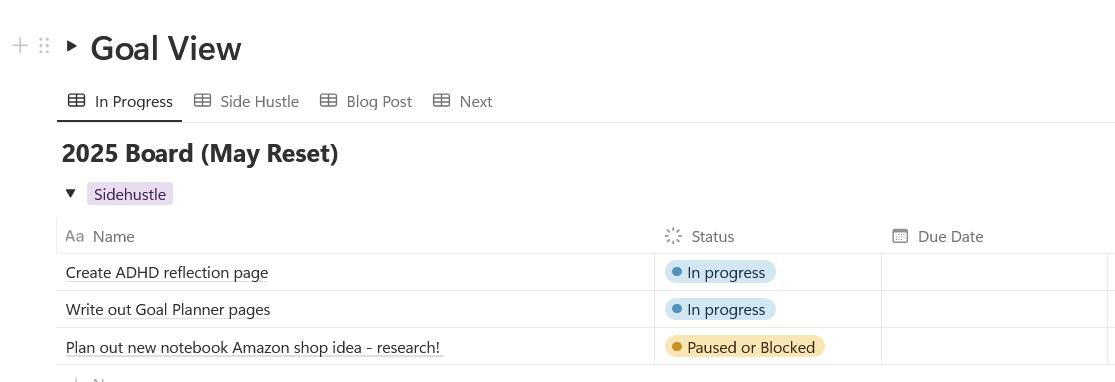
Now I am using tables for view as I find it easy but they are setup the same way. I change the view, edit group as I want. Add filters as you need as well, for example I have a filter on the main page to only show me task that are IN PROGRESS or PAUSED. That means I don’t see anything NOT STARTED or DONE. It keeps it cleaner for me and I know this is the tasks page to work off.
I also have my top categories I am using for tasks, blog post, hustle, etc – at the top of my table or list vs as I mentioned in my reset post, home or travel goals. This is because those are basically on pause for me. It’s just where I am, but this way the most important tasks I am focusing on are at the top immediately.
If you like reminders, you might utilize due dates more than I do; Notion will remind you if you give it a date to work with.
Overall I like using the digital databases because I can write directly in the pages, 10/10 would have loved this for college if you are a student. There is a calendar view too.
You should play with databases and google if you have questions or need a formula (databases can do formula’s and such too! I’ll share a percentage tracker later, and link it here).
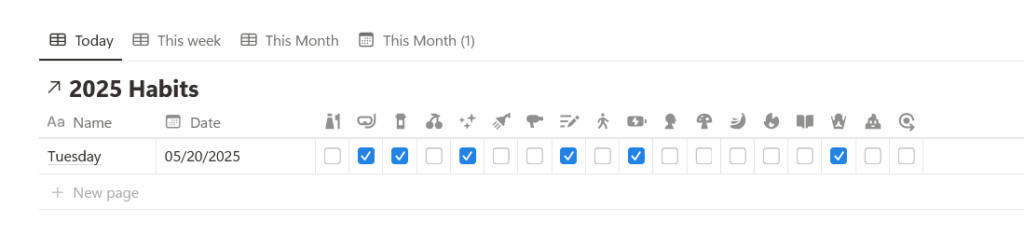
Do you like Notion? Want me to break down how I did my habit tracker next?
Happy Planning