(my) Silhouette Tips
This post will have affiliate links to the products via Amazon.
Hello Friends!
I wanted to do this for awhile, but I keep forgetting. I get a lot of questions on Etsy and I always try to be as helpful as possible. I decided to take what I’ve learnt and put it out there, so hopefully if you are like me, and Googling the issues, you will get some help here as well.
First off, I own the Portrait. At the time, its all I thought I needed and could easily afford it. It was about $70 Bucks on Amazon – it is now $120. I can say I highly suggest this machine for all type of crafters – from felt to paper to artist. I absolutely love this machine, when it is working.
So lets start with how I cut…I have practically cried over my machine trying to get it to work. Thus, I am going to start with my my issues and what was happening at the time.
How to Print & Cut
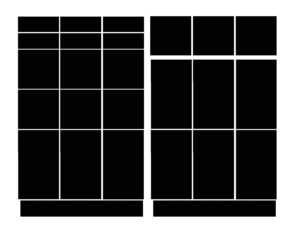
To print and cut you MUST print from the SIL program. I do this by creating the file, usually in Photoshop, then importing it into the program. I then create a black out file – which is the file before, re-saved, then merged and all blacked out on what I want to cut out. For example, here is a simple washi sheet:

Before you can print, you need to setup registration marks, which has the guides. This is located in the upper right corner. Select your machine type (portrait in my case) and then I max out the size.
Once in the program, I usually have to resize them as I work in a high DPI, then I use the trace option over the black page. You need to keep the pages separate for this, apart, or it will be harder to get just the black boxes. Use the Trace Box to over the page, then I always do a high pass filter – 100% and trace the outside. This gets most if not all the lines perfect for stickers. It will only do the outline. I manually do a few lines, and clean up anything that looks messy. Once done I line them up on the guide and we are ready to go.
TDLR:
- Merge or move your project over, both sheets.
- Trace the black images, whole page. Keep pages a few inches apart, so you do not trace the art images.
- Do a high pass filter – max and then select ‘outline only’
- Line up your pieces on the template, make sure you are within the cut lines (red outer lines) and not touching the guides.
Adjust you cut settings as you see fit. To kiss cut I use the stickers option in the system – take double cut off, and set the blade to 2. I also usually set speed to 3 as it can be loud and that helps with the noise for me.
Alignment Issues
What is happening: Cut is off from the planned cut. So you print a pretty icon and its just a few MM to the left of where you want it to be, so really off, its so sad to waste stickers.
I struggled with this when I first got it, I was so sad and upset, this is why I wanted it. If the cuts are off – you need to do an alignment. I highly suggest using this site – as it is the best description out there.
IF YOU HAVE DONE the alignment and its still off, here are some things that could be wrong still:
- Mat is not sticky enough – so paper is moving
- Blade is damaged – will cut askew
- Blade is dirty – stuff gets caught in it, open it up and clean out any paper strands
- Program is being crappy – this happens – just restart the program, yes, this has happened to me. If you try all the above, and still get issues, try this. You will need to remake the whole document though – I think some how it gets corrupted.
Those are the only issues I’ve had, on alignment, so far.
Next – its not reading the guides:
What is happening: machine is not seeing the guide, on the screen you get a reset error to try and manually do it or auto do it again.
The machine needs light. Seriously, hold your phone over it while it registers or put a light over it. It uses the red light to identify the guides, therefore, if it cannot see them, it cannot read it.
Items to close to the guides. This has happened to me one some projects. I try to go back and correct it if I am having issues, so others don’t, on my files. But if you are doing your own, keep in mind you cannot have ANY ITEMS DARK next to the guides. So if your stickers/cut outs are near the guide, if they are a lighter color, it will be fine, if its dark, it could mess with that. SOLUTION: I put a stick note over that item. Its not ideal, as it may not cut all the way through, but it will work.
Make sure the little box is clean and clear of items – sometimes it can get dirty as well.
I actually got the hard core blade, as I cut pretty often and I got tired of them breaking. After about 3 I was like, nope. I also don’t replace my mat as often as I should, I use tape on the top and bottom to ensure it doesn’t move. I really should get a new mat, I do typically get the off Amazon but you can also SOMETIMES use coupons at Michael’s – not always.
I hope this helps! I will add items as I find them, but this is the bulk of the issues I’ve had. I have not done felt yet/before, but I will probably try it eventually. And I have not tried the pens yet either, I mostly use mine for kiss cutting stickers. Worth it. I occasionally will do cut outs though. I can tell you its come in handy for signs lately…
Would you like more tips on the Silhouette? I will do some more in depth tutorials in the future as well as I get asked about it a lot!

