How I Create my Inserts
Hey Friends
Starting a series on how I make my inserts has been high on my list. I even considered doing a class, but it’s a lot and I don’t know if it is worth it. I don’t consider it that special (as silly as that seems) but I’ve also been making things digitally forever so I’m a little jaded in that retrospect.
I use to do all my inserts in Photoshop. I did this, as I was familiar with it and it’s how I make all my stickers, etc I sometimes had issues with it as I wasn’t great at lining things up perfectly or making items exactly the same size. I didn’t mind too much and if it was off, it was off very little.
I now make all my inserts first in my cloud software – Lucidpress – then download and tweak in photoshop as needed (if at all). I love it for 99% of the inserts as I can use tables to make exactly what I want. Canva is a similar program if you are unfamiliar with Lucidpress, though I highly recommend it to all my clients – being able to edit things anywhere and together in groups is incredibly useful.
Side note, I did reach out and see if Lucid had a referral code or anything, but they never got back to me. That is one thing I hate – their customer service sucks.
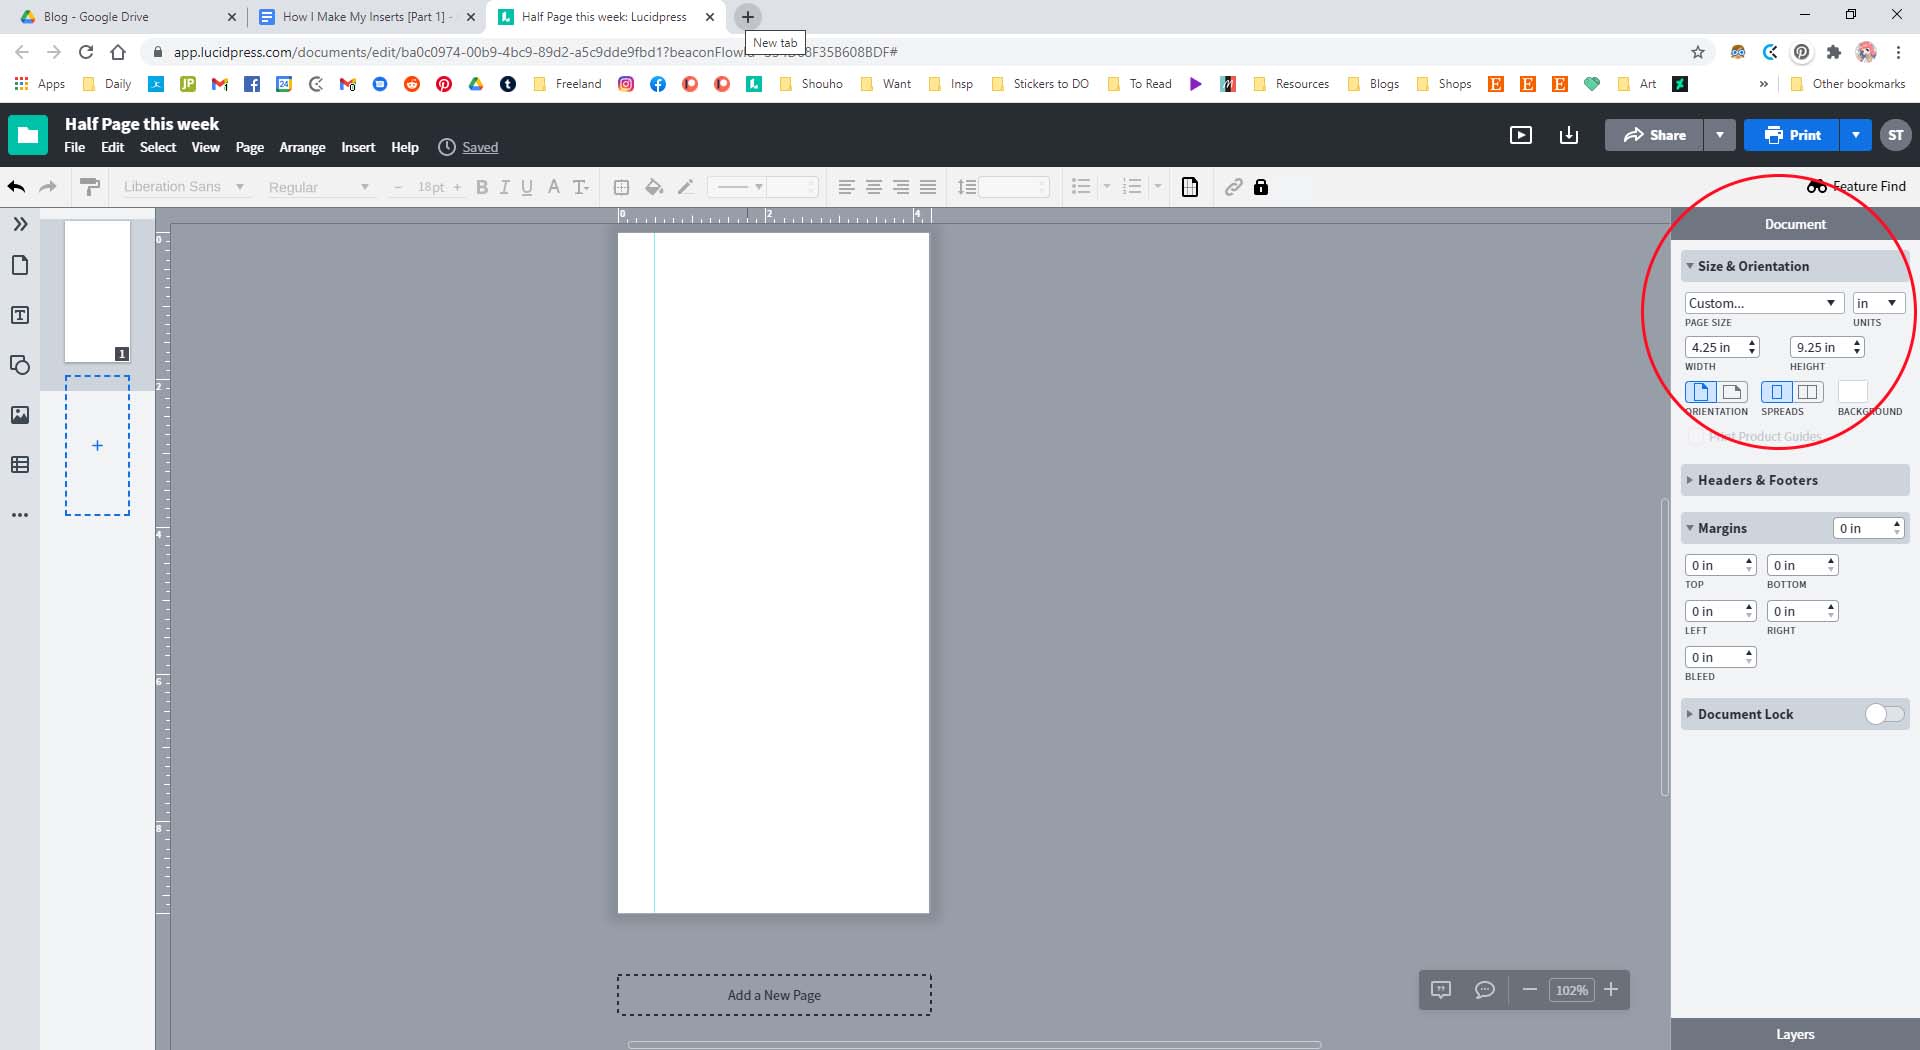
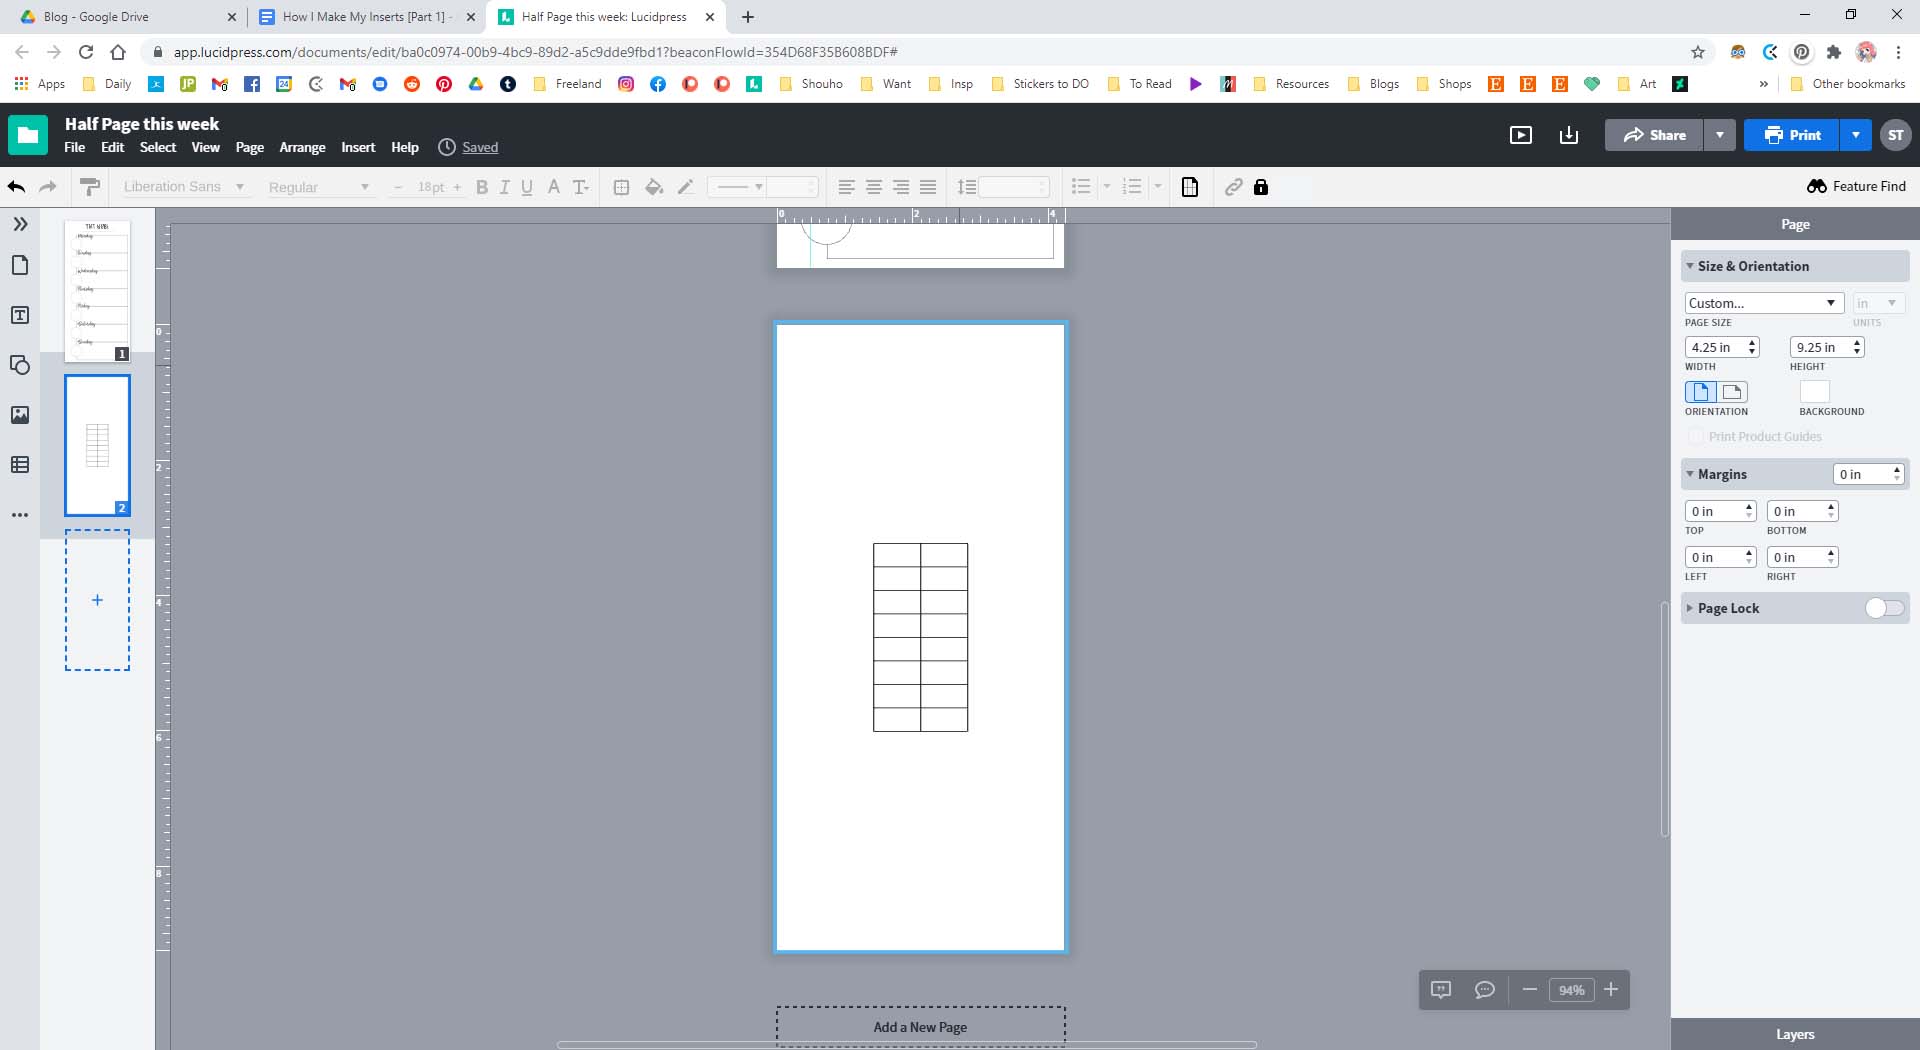
Some tips to get you started, and yes we are diving right in, is to adjust your canvas FIRST before you even get started. I also make the margins 0.5 around it, so I can leave the left side for punching.
You can make anything in this software, just like your printer can actually print on anything if you just find the right settings, which I love. There is a free version, but it limits what you can download in quality. Canva is free and very similar however they don’t have tables BUT they do have a ton of free templates you can start with, so give both a try.
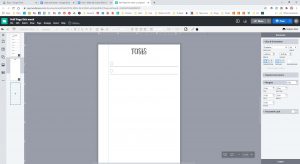
Once you have your page set up, you can start adding features. In this example, I am making a weekly page in half size, as I want to start making some fun half pages. Please note the actual size of HP Classic Half size is a bit less wide – at 4.12 no 4.25 – however I cut a page in half for these tests.
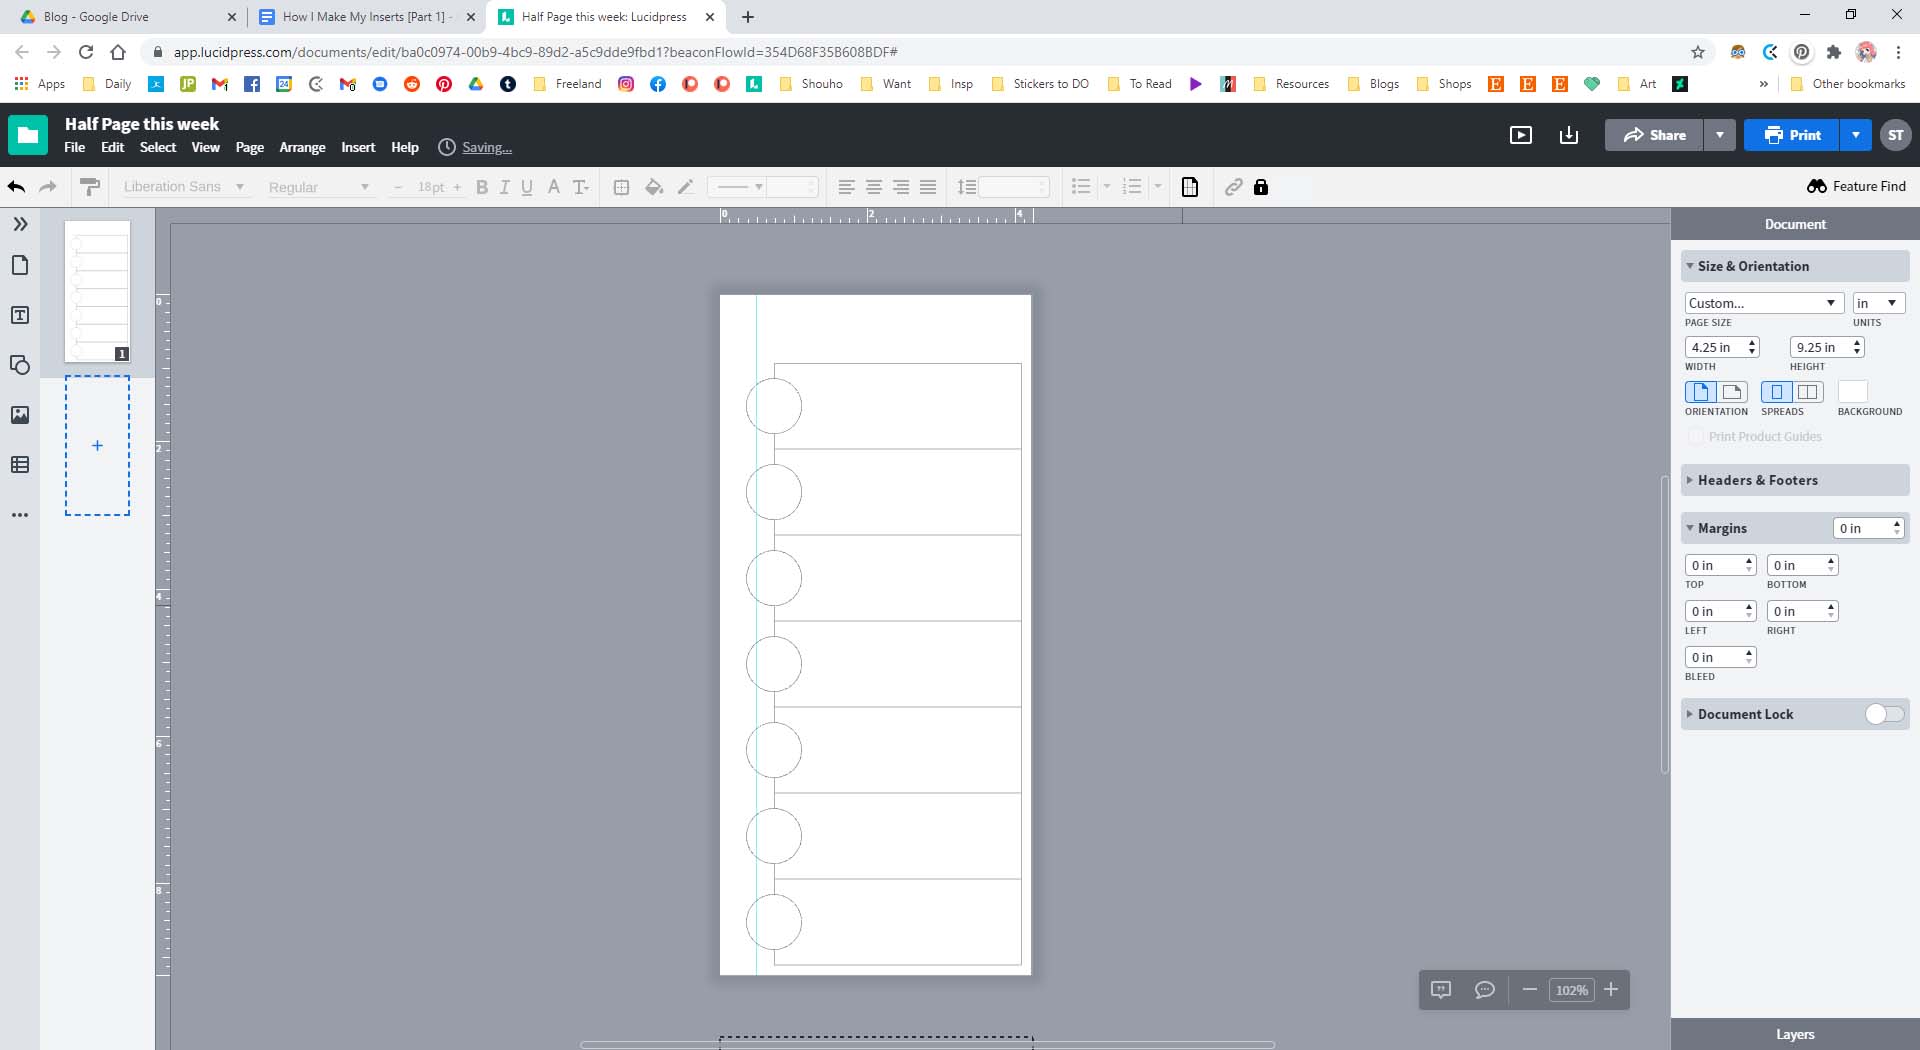
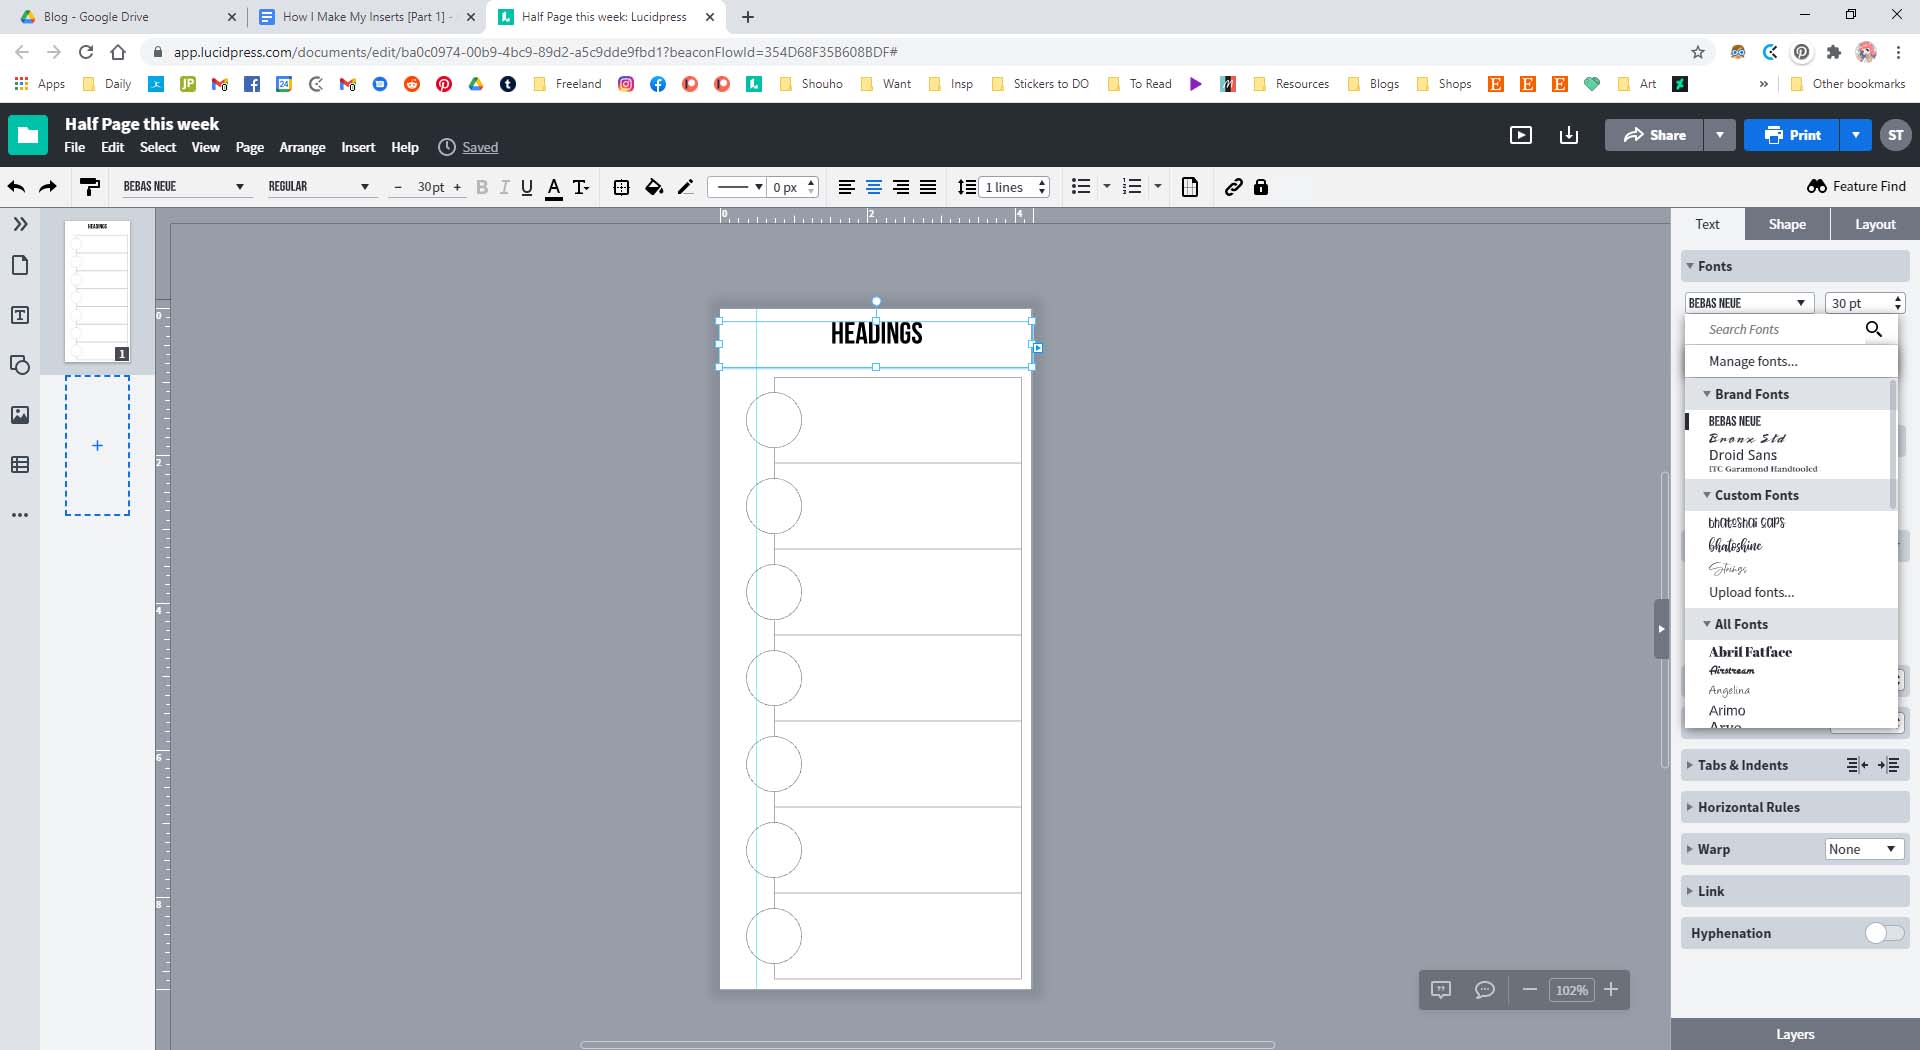
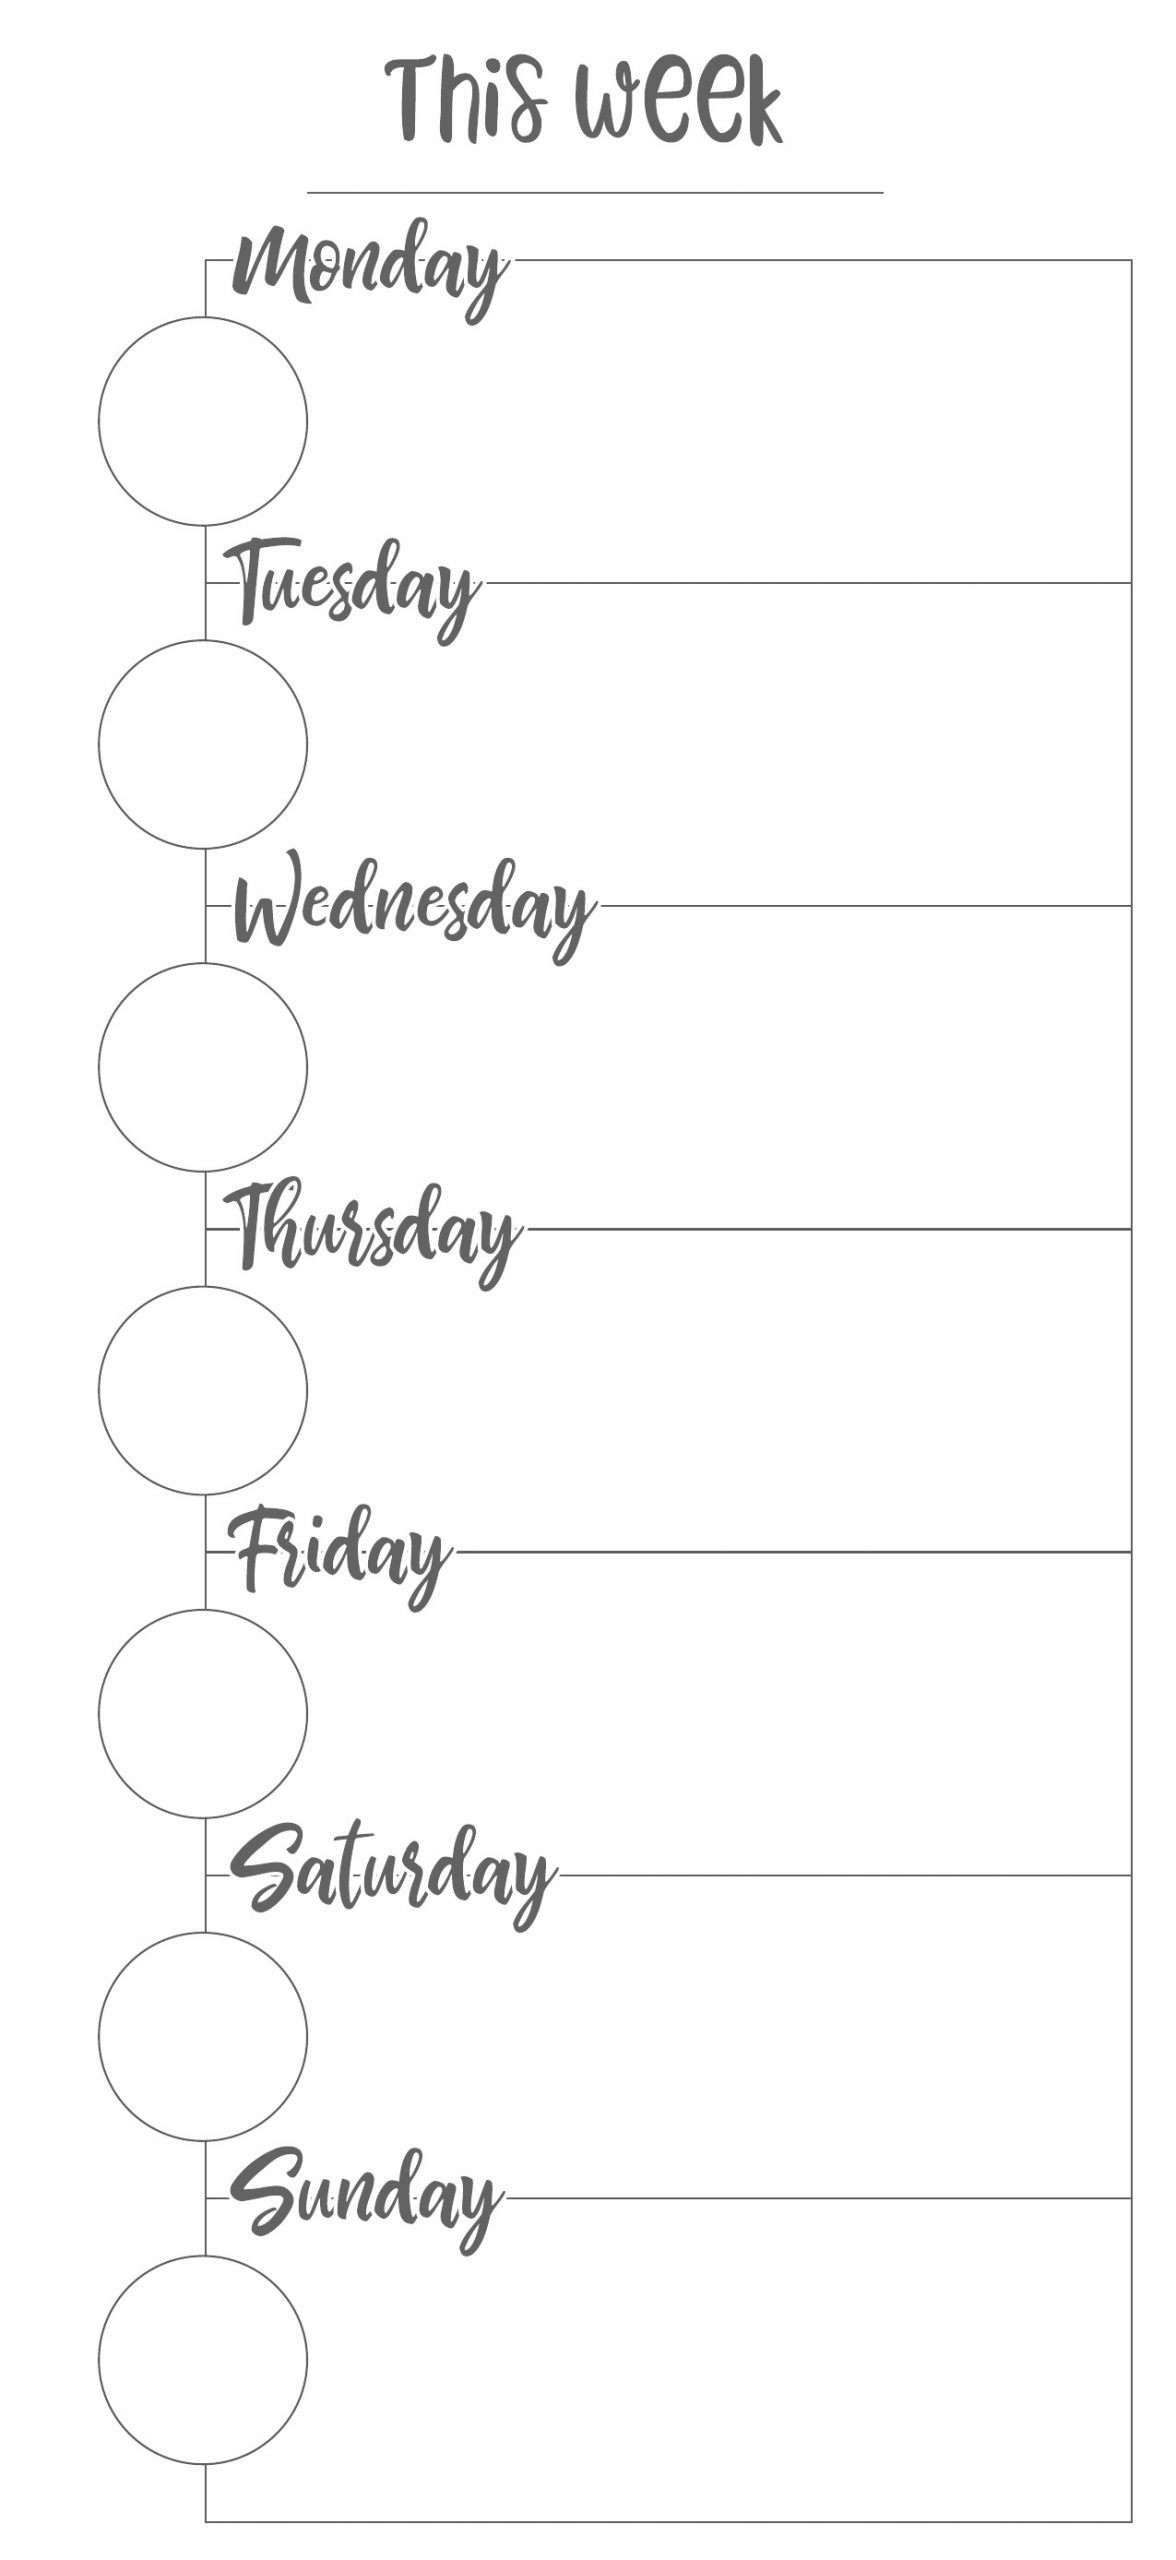
Now I want to add weekday boxes, normally I’d copy from another page but I made the original best week in Photoshop, so I don’t have it to copy here. I plan to do weekly events on the front, and the task list on the back for this one. So I am going to do 7 boxes, with a circle for the dates. That’s really it for this front. I highly recommend playing around with the tool bar to see what everything does on the left. When you are in a tool on the left, settings pop up on the right – for example, text options.
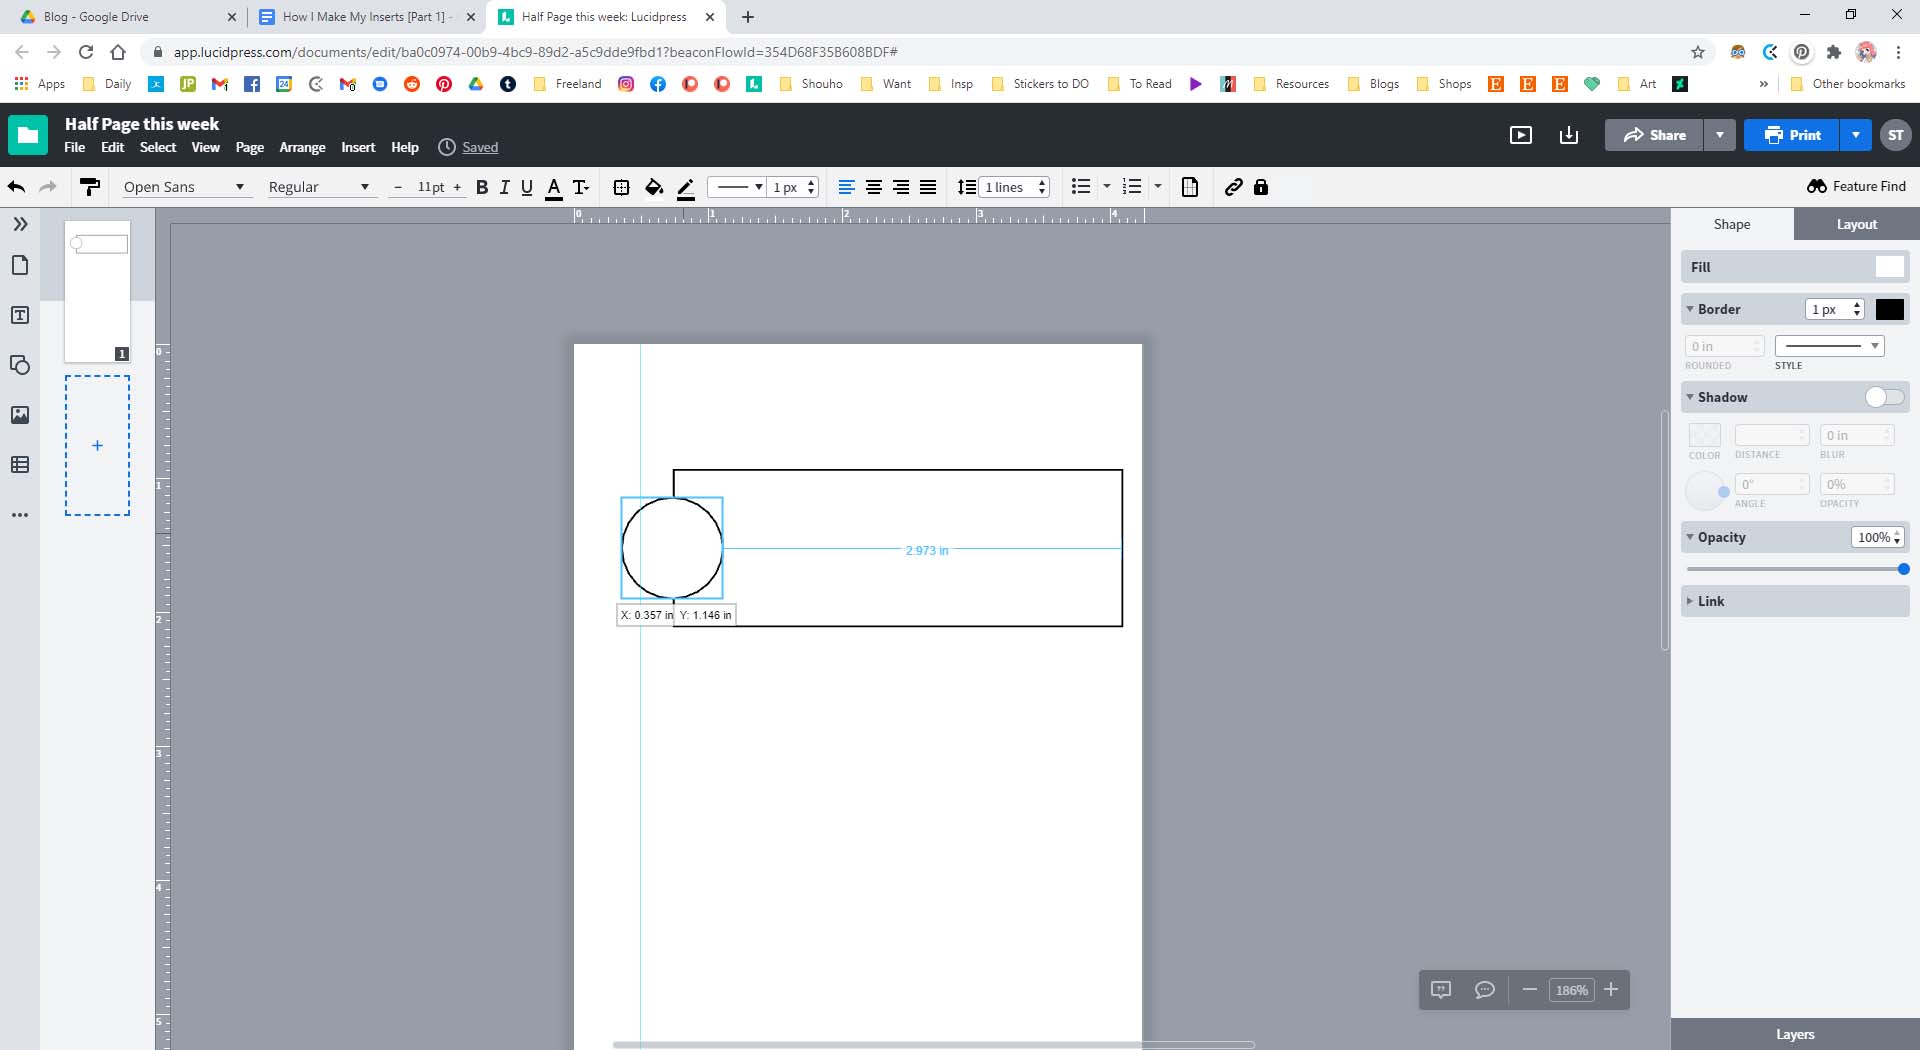
When you use shapes in Lucidpress, you can select them all to resize them together – so I can make my 7 boxes, and make them the same size BUT fit as I need on the page. It will make them even for me, which I love. It will also tell me where the middle of things are – so in this case I can line the circle up in the middle of the left side VERY easily, almost does it for me.
I change my lines a bit, as I don’t like them too harsh – and can just duplicate this down the page. Shortcut wise, you can click on it and press the down arrow while holding Alt & Shift and it will just place it right under. Don’t stress on learning the keystrokes though, if you are just getting started. Focus on getting what you want on paper.
Okay, there are a ton of text options – if you pay you can even upload fonts you won. I have my favorites in here as well as some client’s brand fonts. You can also save brand colors – I have my favorite gray. Yes, I can be boring.
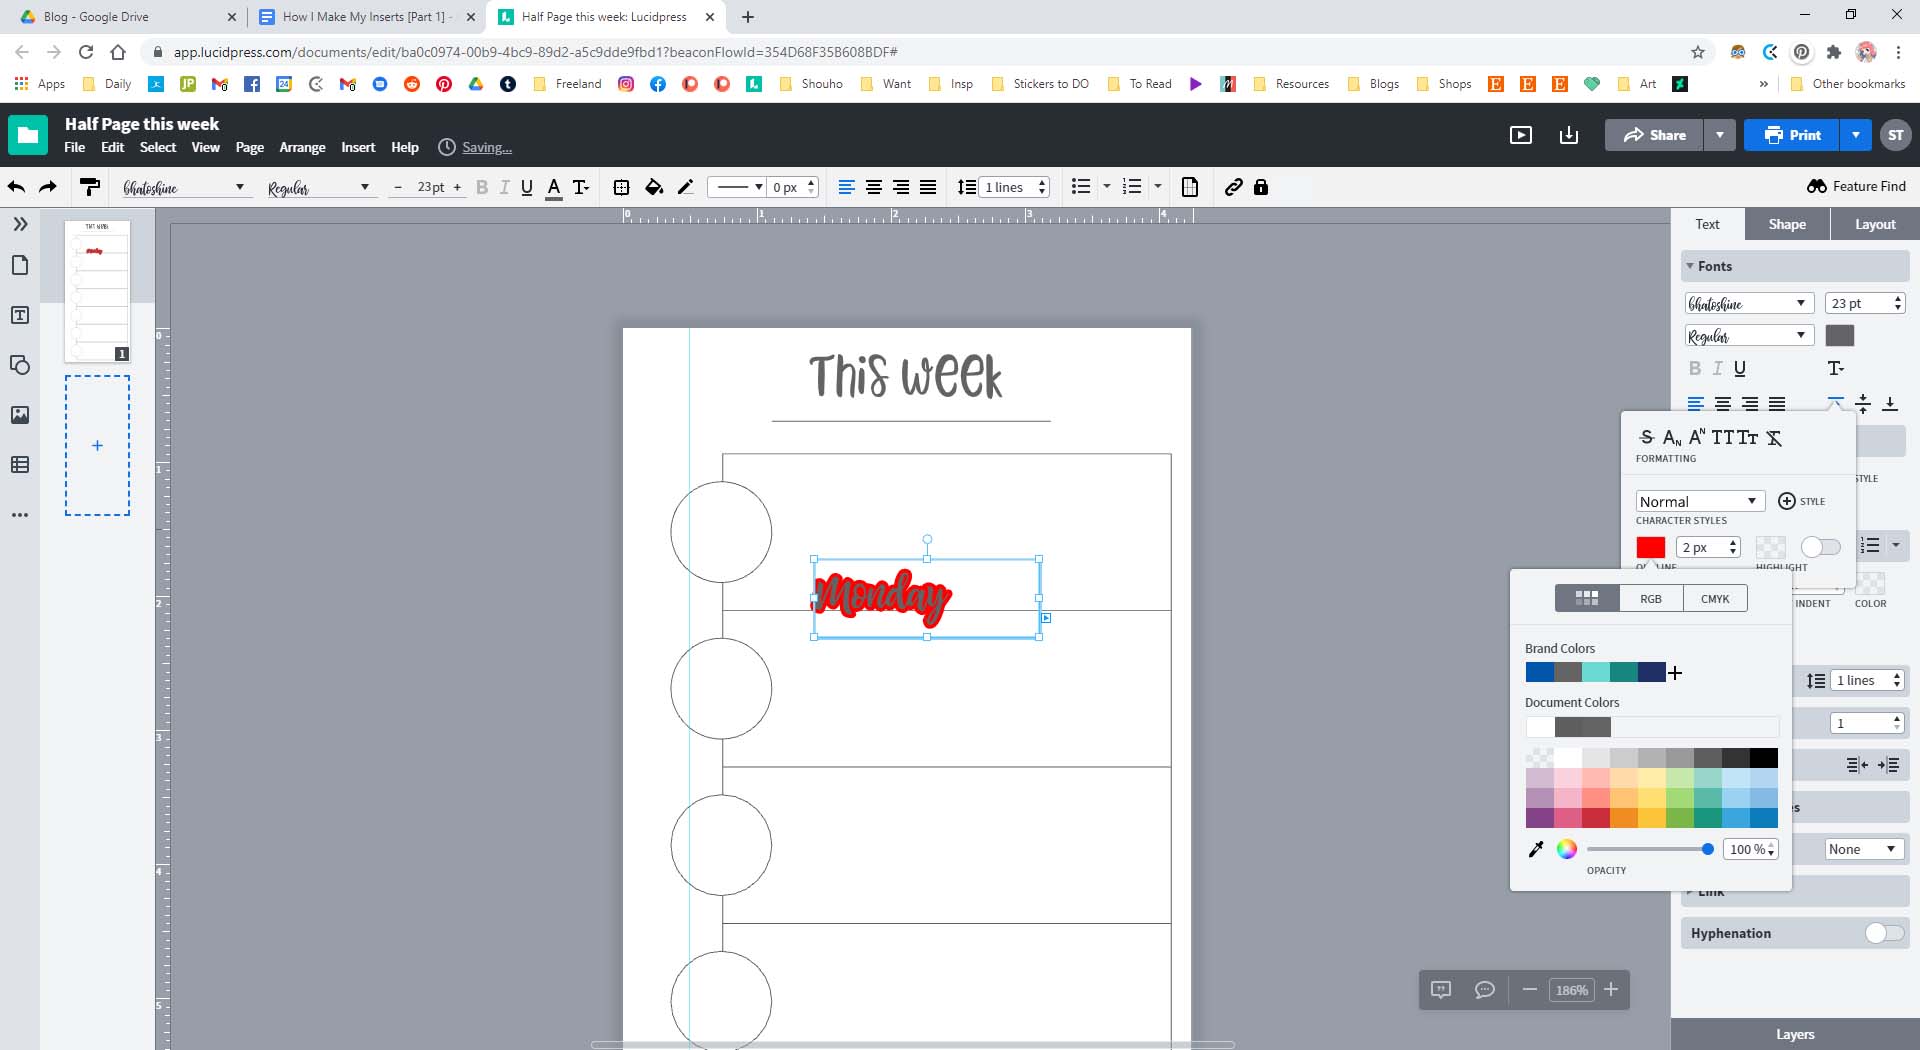
You can add outlines, move them around like objects, and best of all it SPELLCHECKS you. So yeah, finishing this side up and on the next side, I want to do just a checklist. It’s going to have a circle on one side – which I will use bit text for – and I want lines to separate the task. There are also infinite table options.
I keep a copy of my favorite symbols, just so I can copy them easier in a Google doc.
You want to remember your holes here, so add a guide if needed and find your happy spacing (size between the lines) and then it will duplicate it for you once you increase the number of rows.
Make sure to add your dots and that is it for a task list.
Print to test – I can add decor or whatever later with stickers or in photoshop if I want – and this is how I get my first draft of items! I love this program, and yes I pay for it – it’s $15 a month but I use it for clients as well.
Also, once you print, you find errors – like I just did, when I put the margin on the wrong side for the back! Doh! But this is how I test print them, work out these kinks and then go back fix and upload! Mistakes happen, print test and fix its fine.

If this is interesting, I will go over more resources, like images, etc to add.
This was quick but I hope made sense. I can absolutely show more details in the process of short cuts, tables, and things, but this is basically it. Draw your idea out on paper first, I usually tag things I see in BUJUs I like and combine things to make it work for me – if it works I keep it. Draw it, make a simple digital draft, test it, adjust from there. Decorations can be stickers or you can put some items on them in photoshop.
It’s really possible for you to make your own inserts that work for you!
Questions, feel free to reach out or comment below.
Thanks!