5 Ways to Edit Digitally Downloaded Inserts
Hey Friends
It’s the time of year that we tend to start downloading and trying to get our shit together. Happy New year 2022.
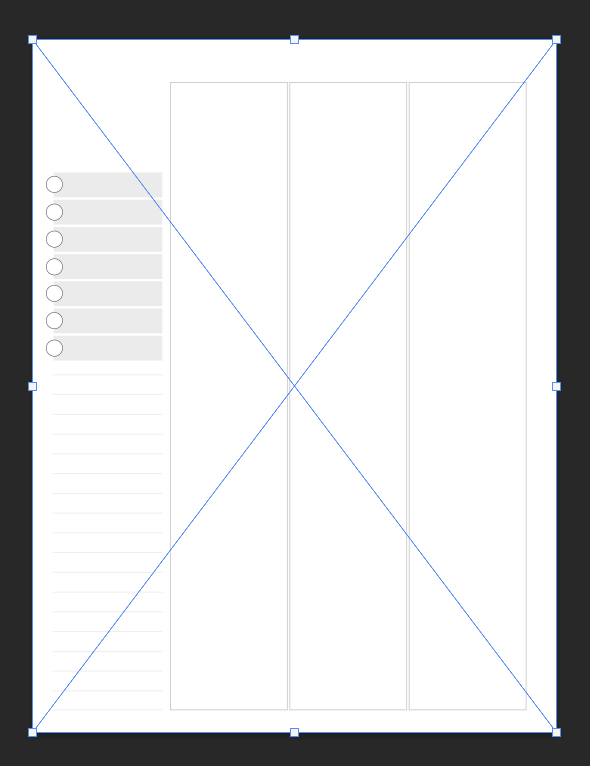
If you are a planner person, digital or printed, sometimes we pick up pages and change our mind on sizes. For example, if you pick up a full-sized planner and now want to move into a Happy Planner Classic or maybe a half-page size, there are some ways you can resize your current planner or pages.
I’ll cover some quick basic methods here, and I hope it helps you if you pick up a page you might want or need, even if you have to resize.
PDF is an easy method, you can change the size in printer settings or do it by percentage. For printer settings, you can click here on how to add custom sizes to your printer page output. Even if you want to keep this file digital this is a good habit to add your sizes in here as you can print to PDF at your preferred print settings.
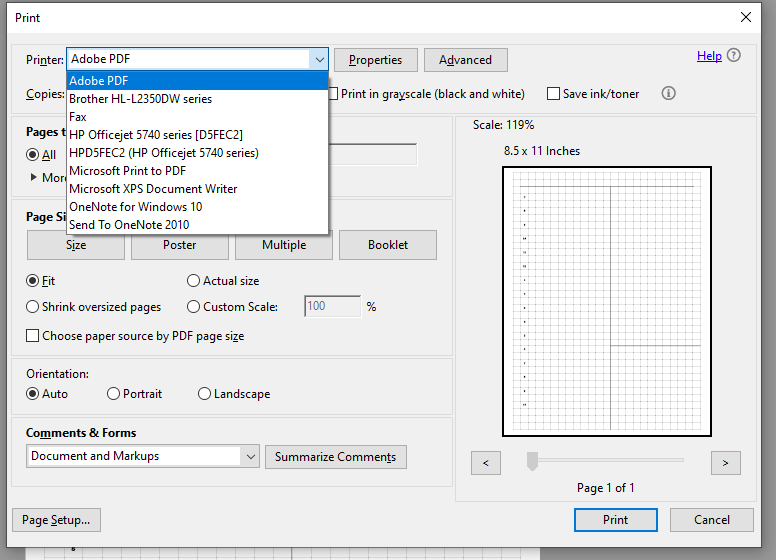
Once you create a print setting, simply print to PDF at this size to get your new digital version. If it is not a good aspect ratio for you, you can tweak it with the below methods as well, but this is an easy way to start. For example, if you had an HP sized insert you wanted to half sized, you could ask it to FIT to page, for 8.5 x 11, then save it and print 2 too a page.
You can also just adjust by a percent, you may need to do a few tests to find the size you need, I know HP classic is 80% from 8.5 x 11 from previous use. That would mean mini HP would be 40%, I would imagine (will update if I hear or see otherwise). You can also then just print to PDF for a digital version or print and go.
Canva or Lucid Press
Both Canva and Lucid allow you to import images, from there you can manually adjust the WHOLE size, or if the insert aspect looks off to you, you can crop sections and adjust it as needed. This is also a great way to remove things you don’t want or change dated to undated.
Simply import the page, cover up the date with a block of white, and you can adjust any page to your needs.
 For example, if you wanted a specific section of an insert, you could just cut it out and duplicate it or arrange it how you want it.
This works in reverse as well! If you have an undated page and import it as the background or image, then you can date the tops. This is how I date my planners, it makes it SO MUCH easier than doing it in Photoshop.
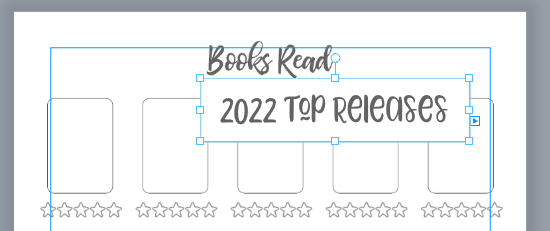
Keep in mind if you are using a free version of either of these the quality of the download may drop. Just something to keep in mind on these type of services. I love Lucidpress and 10/10 suggest it for making your own boxes and table inserts.
Photoshop (or similar)
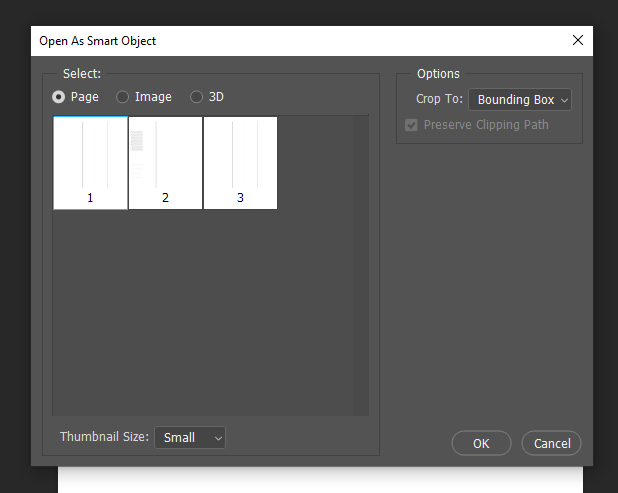
Photoshop makes changing sizes easy as well, with a few clicks you can create a new document with the dimension you want. Make sure you always use 300 DPI for things you intend to print.
Once you have a new document the size you want, drop your page into Photoshop. If it’s a multi page document it will ask you to pick the page – one at a time – which can be time-consuming on large documents. It will auto-size to the document.
From here you can adjust the entire page or just sections. You can keep the ratio or stretch it out to make it fit better (this may warp text). When I do this, it depends on the ratio of what I do. Sometimes I will separate sections of the page to stretch it out, make boxes longer for example but not select the text.
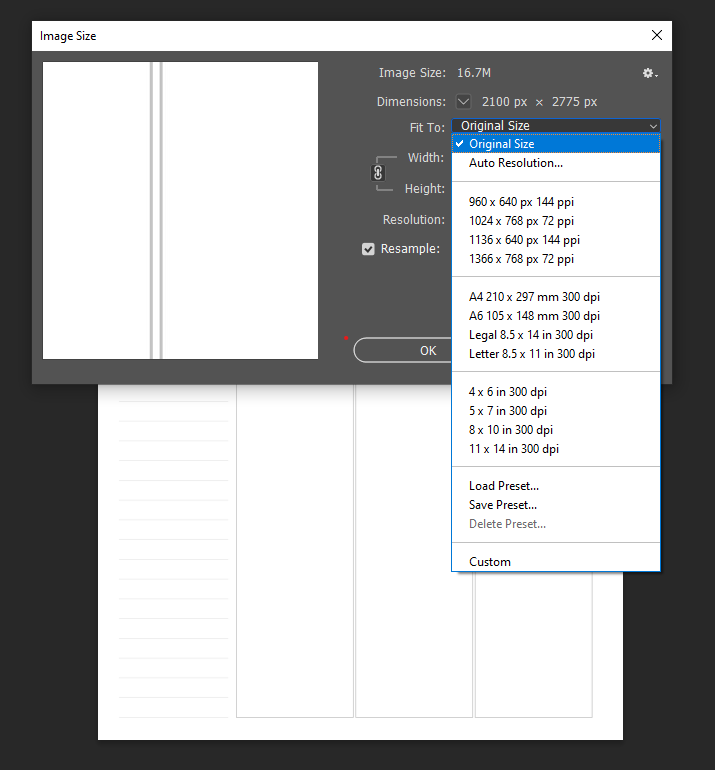
Another method is to load the page into photoshop and let it do the work, you can resize any page under edit → resize → dimensions. Remember to unselect locks, so it changes the ratio. This works great if your ratios are the same (half page to full or reverse) but can make for some warped text from A5 to classic, for example.
Print it to size
Once again, you can download a PDF or JPG and create a print option with your printer. If you are only printing the page and not adjusting any ratios – this is the easiest.
Create your print setting (info here).
Hit Print, JPGs pop up in a window, select your print setting, and then you adjust if you want it stretched out or with more white space (depending on the ratio). Then Windows does the adjustment for you live and print.
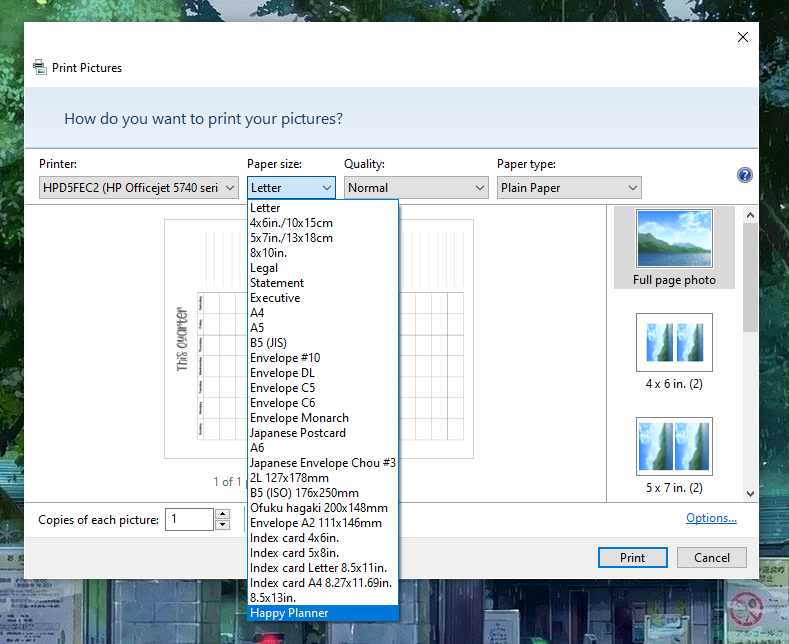
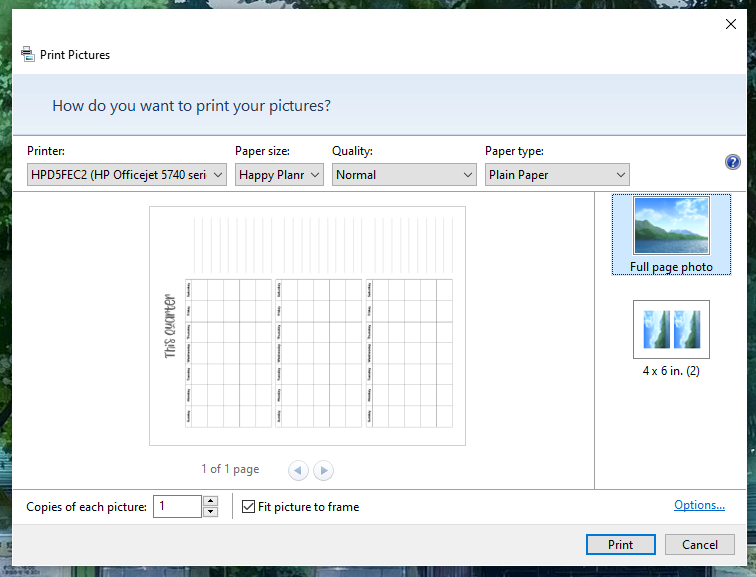
I do this most often and don’t sweat the extra white space if there is any.
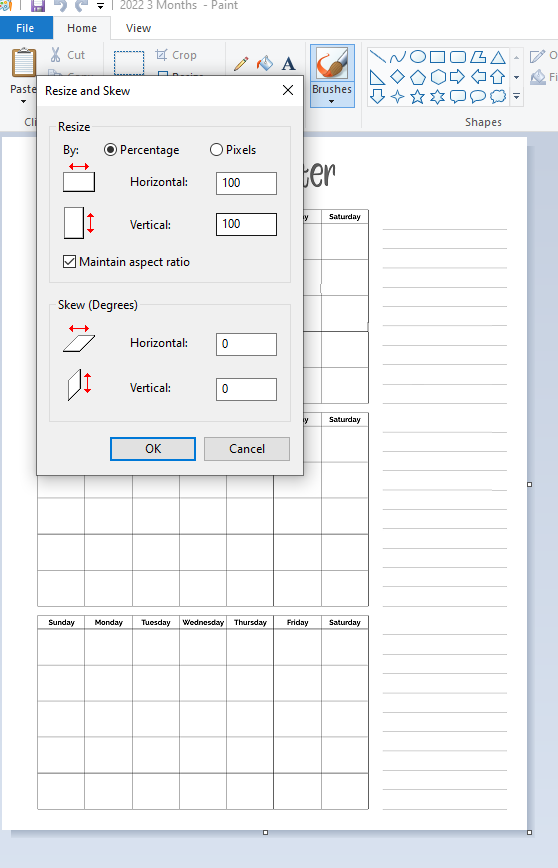
Paint, no really.
If you have a JPG (or convert a PDF into JPG), you can actually do this in paint. If you right-click, and hit edit on most images, they will open in paint (unless you set it otherwise)
Then in paint, you can make changes. You can delete things, resize it, add dates again, add a box or clipart, etc. It’s not as pretty and it’s not perfect by any means but it will work. It just depends on your level of patience, skill, and needs.
I hope this helps you understand you can really make those changes to your planner pages. I think more and more people are realizing the value of making their items custom for them and they can do it. I am so excited to see all the new pages.
I hope this helps you open your mind to all the downloads out there!
Happy Planning